
 Happy 2018! With this monotonous Toronto winter chill and continuous powderings of snow, it may feel like longer, but we have made it 1 month into the new year; congratulations to all! Though this post is coming further into the year than expected, somehow, I have unintentionally come back on the Sunday of all Sundays. My blog has been void of football for quite some time now but it’s funny that my 1st post of 2018 is live on Super Bowl Sunday [let’s go JT!!!].
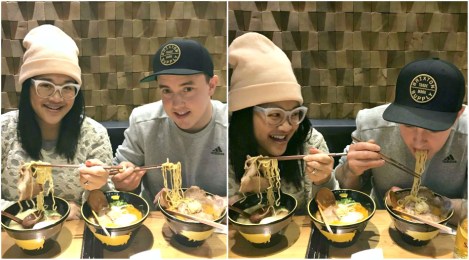
So far, the new year on my end has already been buzzing. As the impending end of 2017 neared, I could feel change bubbling and ready to overflow. The start of 2018 brought with it a new job opportunity [one more aligned with my creative goals] and Mike and I shared some exiting news that we’ve been holding onto for a couple months now.
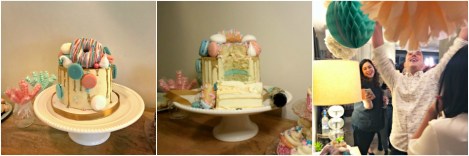 [Gender reveal party hosted by our dear friend Shereen + cake from Le Dolci Bakery]
Mike and I are thrilled to be expecting a Baby Boy! Baby K is slated to arrive mid May and time is flying by. So now that the cat is out of the bag and the belly has been unleashed, my DIY antenna is going crazy and you better believe that I will be sharing. My first prego related DIY appropriately coincides with all things announcements and news sharing.
 In lieu of a traditional baby shower, Mike and I are throwing a party to celebrate Baby K and I’m sharing with you my save and splurge; transforming a standard printed invite with personalized touches.
T H E I N V I T E S
I started with a SUPER SAVE stack of 50 invites ordered from Vistaprint. Their prices are affordable as is but I serendipitously ordered mine during one of their annual sales and saved up to 50% off! It was an easy customization + order process and their standard ship window was over stated as my invites arrived days before expected.
- 50 -5×7″ vertical flat invitations colour printed on both sides on premium glossy paper + white envelopes = $31.17
- 140 -return address labels [I bought extra for the Thank You cards] = $7.79
T H E E N V E L O P E S
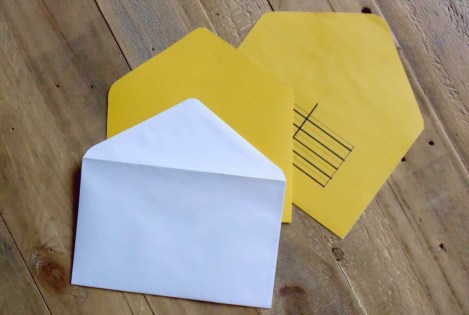 The envelope transformation started with 2 templates. The 1st was a template for addressing [to ensure my penmanship remained centred and straight] the 2nd was for the envelope liners.
TEMPLATE 1 [addressing]: trace the envelope out onto a piece of card stock [or any heavier weighted paper] and cut out. Slightly trim the 2 parallel sides of the envelope body [helping the template to slip in and out of the envelopes easier and lay flat when using]. On the envelope body, locate the centre and draw evenly spaced lines and any other guides you require for writing the addresses. Outline with a thick Sharpie marker.
TEMPLATE 2 [liners]: trace the envelope out onto a piece of card stock [or any heavier weighted paper] and take in the outline of all edges excluding the bottom about 1cm. Proceed to cut out.
H a n d A d d r e s s e d I n v i t e s
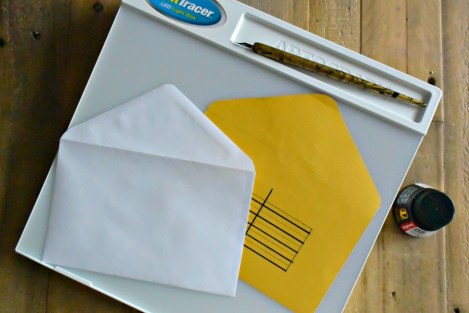 To increase my ease in seeing the straight lines through the envelope, in conjunction with using the template I also used a light box; highly recommended. I purchased the one above from Michael’s [with a coupon!].
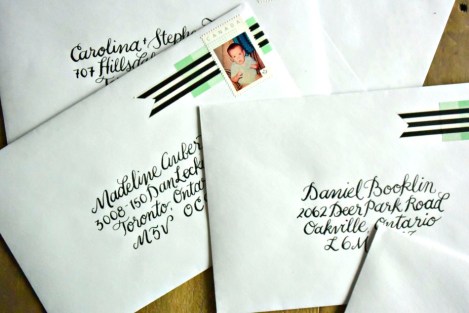 Up to this point, my calligraphy correspondence extended only to Christmas cards. Perhaps it was all practice for this moment. I took a chance and decided to calligraphy all the ‘To’ addresses on the invites but reduced my chance for error by ordering ‘Return’ address labels to adhere to the back of the envelopes.
- Speedball Indian Ink in Super Black from DeSerres = $6.99
C o l o u r f u l P a p e r L i n e r s
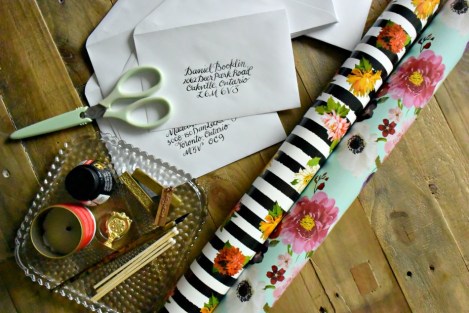 I habitually purchase wrapping paper whenever I see a pattern or texture I love or when there’s a really good sale. I purchased these 2 rolls at Indigo a couple years ago and have yet to use them but, I knew immediately that they would be the perfect liners to add more colour to these invites.
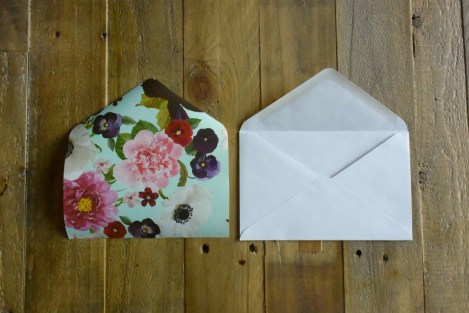 To make each liner, simply trace out the template onto the back side of your paper of choice, ensuring that you take into consideration the paper pattern direction, and cut out.
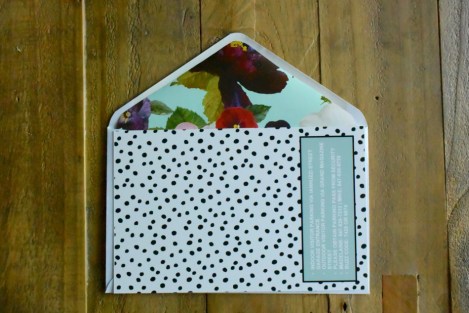 Next, slip the paper into the envelope face side out until the bottom edge is directly against the bottom of the envelope. With the use of one of the invites as a folding guide, align the edge of the invite along the envelope’s flap fold crease. Holding the invite in place, fold down the envelope flap along it which in turn folds down the paper without shifting.
 With a glue stick, adhere the envelope flap to the wrapping paper. I didn’t bother adding glue to the bottom half of the wrapping paper as it stays in place as is and this also ensured that there would be less bubbling or creasing [from the glue contact] then there needed to be.
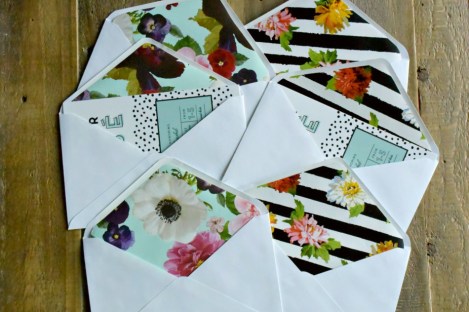
- Floral wrapping paper from Indigo = $2.99
- Striped wrapping paper from Indigo = $3.99
- Glue stick from Michaels = $2.00
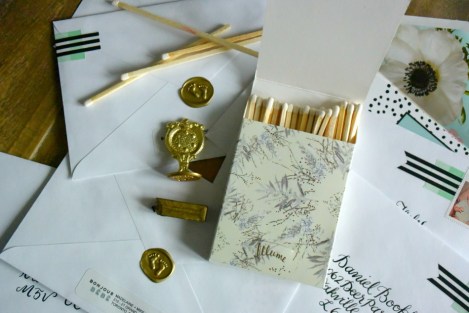
T H E S E A L
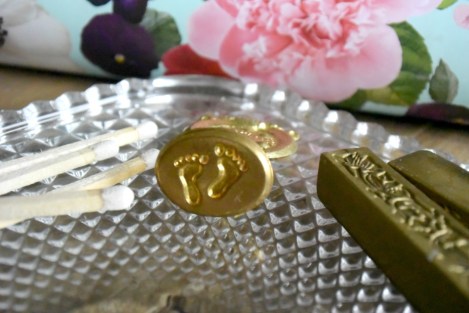 It’s no secret that I love a wax seal; it’s the perfect closing touch to an invite. I came across the most perfectly adorable wax stamp and couldn’t resist scooping it up for our invites .
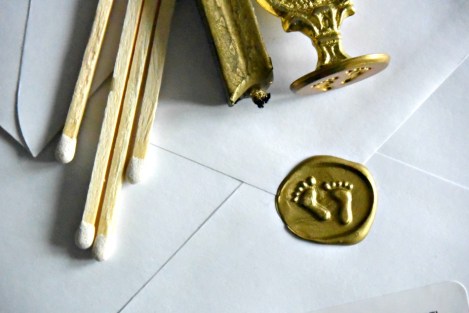
- Wax stamp from The Paper Place = $16.99
- Gold wax [4pack -each wax stick lasted about 16 envelopes] from Michael’s = $5.09
T H E F I N I S H I N G T O U C H E S
A P o p o f C o l o u r
To add a little more colour to the envelope front, I cut up and layered some Washi tape to the stamp corner. Wrapping the tape around the back also added a nice pop to the back of the envelope.
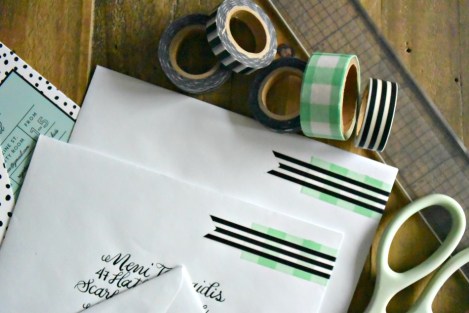
- Mint Washi tape from Micheal’s = $2.97
- Striped Washi tape [in a multi-pack] = $8.97
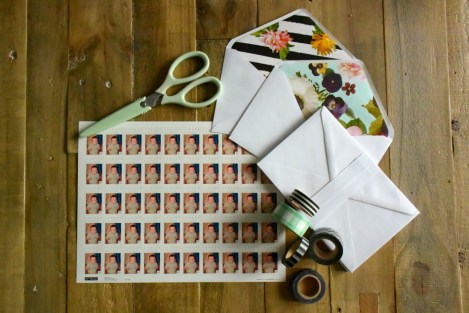
T h e S p l u r g e
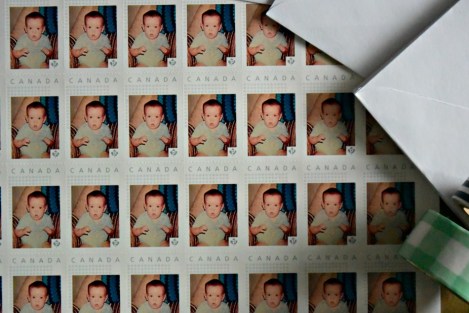 The final personal touch to our invites, came in the form of baby Mike forever immortalized with a postage stamp. I just about died when I received this package in the mail. The stamps were perfect and were worth the splurge.
- A sheet of 50 personalized picture postage stamps from Canada Post = $86.39 [inclusive of tax and expedited shipping]
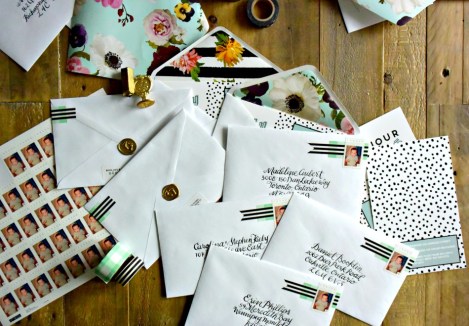
All-in-all [with taxes and shipping included] each invite came to about $3.60. The invites turned out better than I had imagined and I’m so excited to get them to the post office. This officially marks the first mail correspondence of Baby K!
Cheers to an exciting start to 2018 and Happy Super Bowl Sunday!


Congrats to you and Mike! Love the personalized stamps. Didn’t know you could that 👍🏻 Your blog is so beautiful and creative 💕
Hi Kira,
Thanks! We are nervous yet super excited. Life will definitely be different here on out.
I’m obsessed with the personalized stamps. They are a little more pricey than normal postage but I think well worth it.
Hope you’re well. Thanks for stopping by.
-Madelaine
Pingback: Washi Tape Distractions | SO IT'S SUNDAY·