
As a kid, my family vacations involved loading up the van and hitting the road destined for adventures in different provinces and states. We saw zoos, parks, museums, rock formations, bodies of water, dino bones and all other must see landmarks along the way. As we exited through the gift shop at each venue, I stopped to look at every spinning rack and magnetic tower housing personalized name knick knacks by chance MADELAINE would be in the mix and 100% of the time it was not. Little did I know that this lack of name representation would later spawn into my affinity toward everything personalized.

Fast forward 20+ years later and I’ve set the same path for my son. I’m willing to bet that, Atlas, will likely not be on any license plate magnet, “-enter more common name- was here” keychain, or personalized scenic mug. So, in honour of the personalization that he will never know come gift shop exit, I took to embroidery to add that missing personalized touch. My first canvas of choice was a light weight pullover. I loved the way Atlas’ turned out so much that I decided these hand embroidered sweaters would also make the perfect gift for 3 little guys on their birthdays.

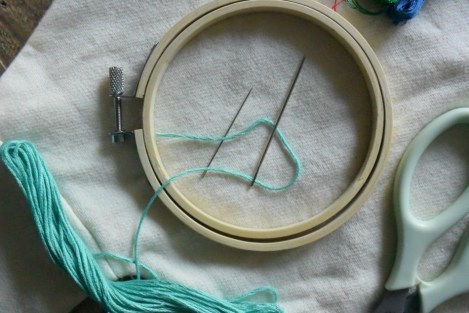
I’m not sure if the way I went about this embroidery project was the “right” way but, like most things I do, I make it up as I go and adjust accordingly. I started this project with the following materials
- solid coloured cotton pullover
- coloured embroidery floss
- needle large enough to fit embroidery floss
- pencil
- scissors
- masking tape
- small embroidery hoop
- calligraphy pen + ink
- ruler
- youtube vids on hand embroidery
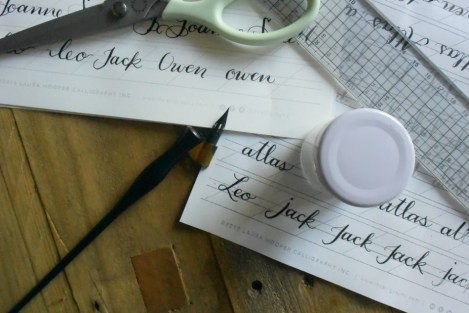
With all font related projects, I started by writing out each name in calligraphy to get a feel for design and size.
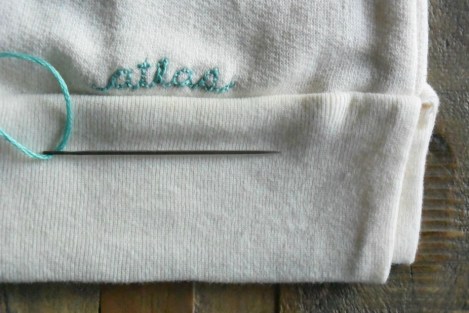
Using masking tape as a guide and to keep things straight, lay out the desired placement of the name on the sweater

With a pencil lightly write out the name on to the sweater as a guide for your embroidery [I initially tried tracing/transfer paper but that didn’t work for me]

Frame the written name with the embroidery hoop
Separate the embroidery floss into its smaller strands
Using 3 strands, thread the needle and start the needle work
*For the most part, my stitch of choice was the ‘backstitch’ but I course corrected as needed when the letters got wonky
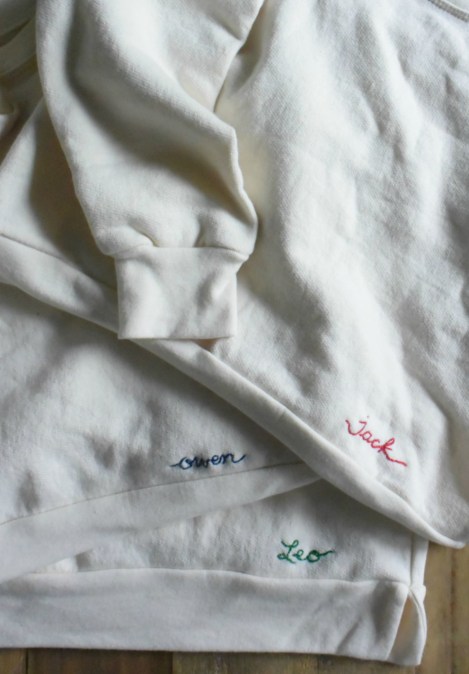
I was thrilled with how they all came out. Even more thrilling was my latest embroidered item below. Try not to die of cuteness!


