
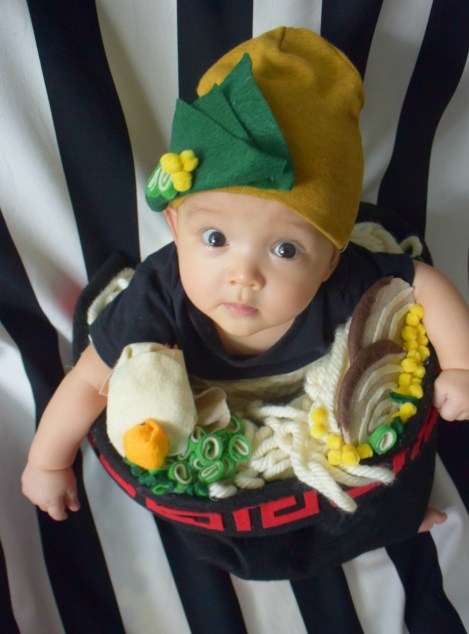
It should come as no surprise, that when choosing Atlas’ Halloween costume we would land on something food related and even less of a surprise that it would inevitably be a bowl of ramen noodles. When we announced that Mike and I were expecting, we chose to do it at our usual Sunday lunchtime haunt over 2 bowls of Spicy Garlic Ramen [and 1 bowl of Shio for me]; so, how perfectly fitting that for our little dumpling’s 1st Halloween, he’s going as a bowl of ramen.
 Made possible by a long-weekend visit from my Mother-in-law, 2 Atlas naps, and 1 late-night glue gun session, I was able to create the ultimate bowl of ramen; low sodium, low fat, topped with all the fixings, and extra cute! Though I would have loved to post a detailed step-by-step DIY tutorial on making the components to this noodle bowl, production time was limited to Atlas sleeping hours and Grandma playtimes. I had to work quickly and efficiently to complete the costume with no time to stop and take pics along the way. That being said, I will do my best to provide as much detail as I can on each component of the costume with the pictures that I did manage to snap.
S U P P L I E S
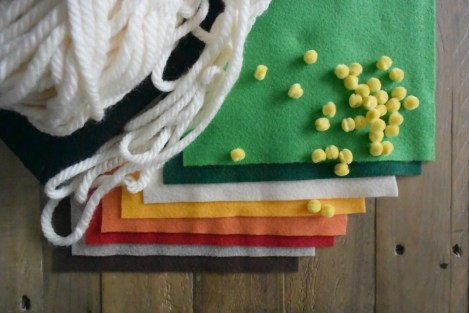
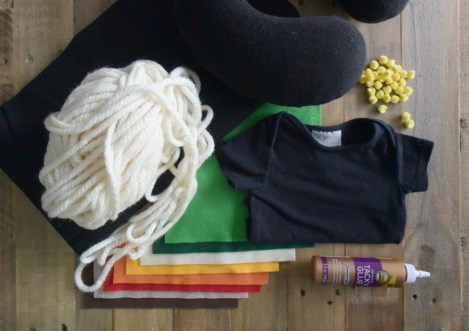
- Large piece of black felt [I purchased mine in at Michael’s]
- Coloured felt sheets
- orange, dark green, light green, cream, yellow, brown
- Cream coloured yarn
- Low heat glue gun with glue [I quickly learned that Tacky Glue, as featured above, does not work on felt]
- Fabric scissors
- Needle + black thread
- Mini yellow pom-poms [found in the pipe cleaner aisle of Michael’s]
- Black bodysuit
- Airplane neck pillow
- Beanie
Being married to a chef, you learn that a successful recipe begins with your miss-en-place [preparing your ingredients] and uniform knife cuts [which mine never are 🙂 ].
I N G R E D I E N T S
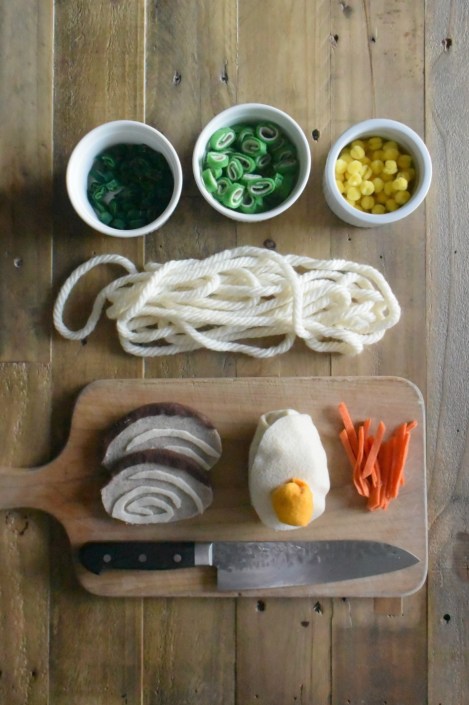
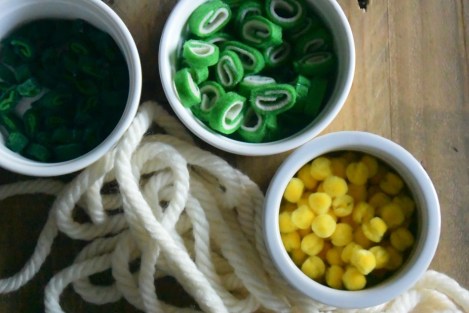
- Noodles: Yarn
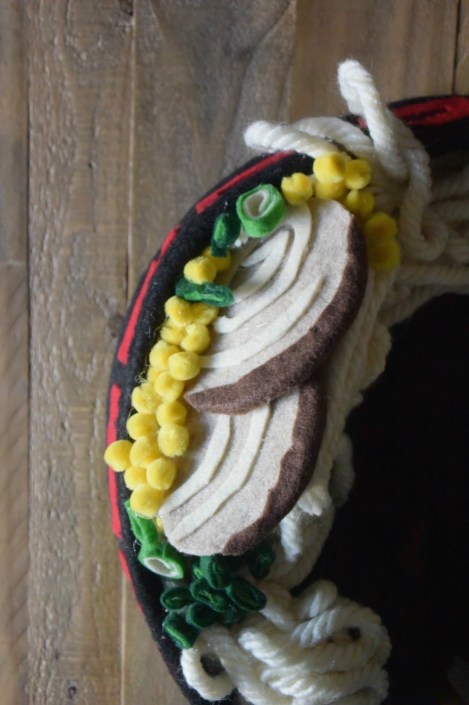
- Carrots: Glue together 2 – 2″x 5″ rectangles of orange felt. On a diagonal, cut 1/4″ strips a la julienned carrots
- Corn: Mini yellow pom-poms
- Seaweed pieces + green onions: [You will have to play around with size] Start with a 4″ x 11″ piece of dark green felt and a 3″ x 11″ piece of a lighter colour felt. Centre the smaller piece atop the larger piece and glue together. Loosely roll the double layer felt and glue closed. Cut the formed tube into 1/4″ “slices”.
- Rolled pork belly slices: Glue together 2 layers of oatmeal coloured felt and cut out an oval pork shaped piece. Using a strip of brown felt, edge the top half of the pork piece and glue down. Lastly, out of cream felt, cut out random thin swirled/arched pieces and glue onto the pork.
- Egg: Crumple up excess felt [or a plastic bag] to form an egg-shaped oval dome. Cover oval with cream felt cupping fabric smoothly on one side and glueing down folds on the opposite side. Create a smaller ball out of yellow felt and glue onto the bottom half of the oval. With a piece of cream felt cut out a similar sized egg-shaped oval with a hole where the yellow yoke can pop out of and glue down hiding all the folds and glued bits.
- Nori: Squares of green felt
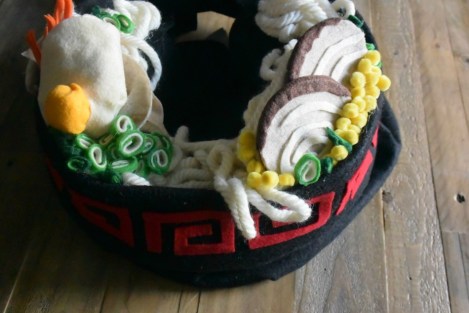
- Ramen bowl: Neck pillow + black felt + red felt
If you haven’t already mentally pieced it together, the neck pillow is to go around the baby’s waist acting as the main structural component of the bowl. The bowl construction was a little harder to articulate without step-by-step images. I tried to break it down and it read too confusing, so here’s a little summary of what I did to construct the bowl.
With strategic accordion style folding of the black felt, I created a lip/rim for the bowl with an over hang to drape and tack over the top of the neck pillow. Before attaching the black felt to the pillow, I decorated the rim edge with a red scroll pattern, trimmed the black fabric to my desired length [enough to cover the bottom half of the neck pillow and cover Atlas’ legs + 2.5″ for the hem] and sewed in an elastic hem along the fabric’s bottom edge. Once decorated and hemmed, with a needle and thread [so that I can easily remove it for later travel use] I tacked the overhang fabric down to the top of the neck pillow then proceeded to go glue gun crazy sticking on yarn noodles and felt toppings onto the black felt protecting the pillow top.
See, that all probably made no sense without a visual [or even with a visual]; but I tried!
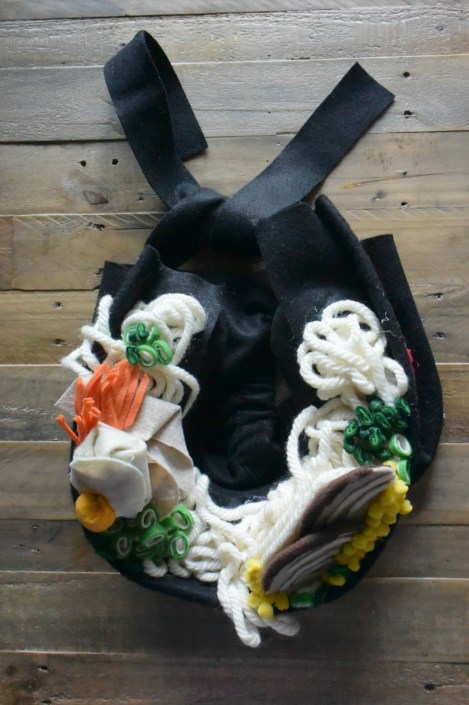
For extra security I attached ties to the open back edge of the bowl
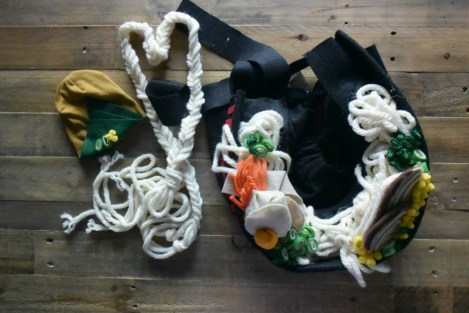
Then, I went extra EXTRA and created a braided noodle belt to wrap around Atlas while in his black bodysuit and a nori hat to complete the look. Note, similar to the neck pillow, the felt nori pieces for the hat were loosely tacked onto the beanie with a needle and thread for easy removal. The green onions and corn pieces were glued directly onto the felt.
You put the hat on the baby and the baby in the bowl and there you have it -RAMEN!
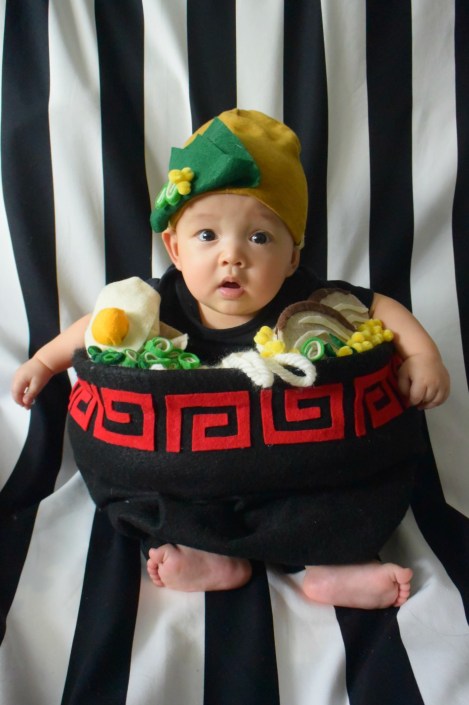
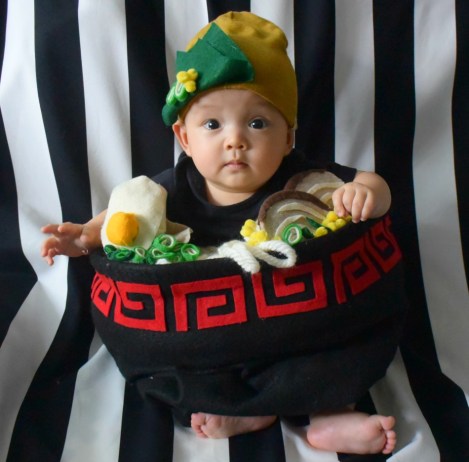
Atlas was extremely confused and concerned about his ramen get-up. I got some great early annoyed/crying pics which eventually led to this confused and some what pleasant face. Photographing a baby in costume while he tries to sit up was hard work. I was out of breath and sweating by the end of it. Luckily, I got some clear shots. I am so happy with how the costume turned out. Atlas is the cutest bowl of ramen I have ever seen.
Happy Halloween!!!


That’s the most amazing thing I’ve ever seen in my life. B
________________________________