
First comes Christmas, then a new year, and then it’s Mike’s birthday; for as long as I can remember our holiday season always starts with a sip of eggnog and ends with a slice of cake. Though each year for my birthdays, I blow out a candle atop a Marie Antoinette cake from Nadège Patisserie [as I ALWAYS request one and will continue to do so], Mike blows out a candle atop whatever cake creation I surprise him with. This past bday, I was spoiled and indulged with 2 cakes; my delicately light and dreamy Marie Antoinette AND a dangerously delightful and sinfully sweet nostalgic Birthday Cake from Milk Bar. So, for Mikes big 3-3, I decided he needed his own Birthday Cake birthday cake.

Addictively delicious and remarkably reminiscent, as intended, of everyone’s fave childhood funfetti dessert, I knew the Milk Bar cake would be the perfect surprise for Mike. Limited on time [as usual] and funds but armed with enough Netflix and internet footage of Christina Tosi making her no-fuss layered creation, I was confident that I would be able to recreate something similar. After a quick Google search, I found Christina’s exact recipe on bonappetit.com. The post detailed recipes for the cake’s 3 essential components: the cake, the cookie crumb, and the icing. Each read completely doable and as an added bonus, I had most ingredients already in my pantry. However, I decided to go with efficiency over home cookery and opted to make the recipe ‘next level’ do-able spending $3.99 on a box of the OG sprinkle cake mix and eliminated recipe 1 from my list of to-do’s saving on both ingredients and kitchen time!
Aside from the box cake bit, I didn’t stray too far from the recipes; so be sure to check them out. Instead of sharing the already published and extremely well detailed recipes, I will be sharing some tips I discovered along the way.
T H E C A K E

My step 1 was -Buy cake mix, follow directions on back, and bake

CAKE NOTE 1: You will have to monitor bake time based on the size of your pan. I stared at that oven until my cake was golden. Pressure was on, I could not mess up a box cake! In the pan, it was perfect.
CAKE NOTE 2: After messing up my box cake… As per the instructions, greasing the pan should have been sufficient in avoiding sticking. However, it was not. When I flipped my pan over, the cake stuck and when I carefully attempted to unstick it, it crumbled. In Christina’s recipe she used waxed paper to avoid this mess.
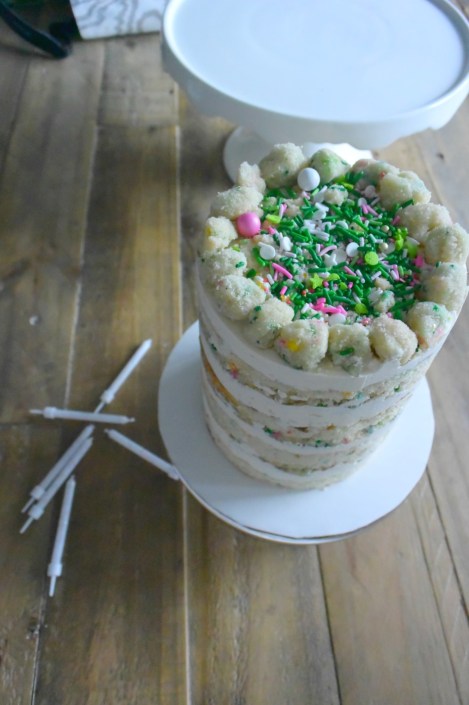
CAKE NOTE 3: I didn’t have a round cutter or cake pan in the size I wanted. To form my layers, I used the bottom half of a 12cm round tin container. I was able to cut 2 complete rounds with my broken cake mess and piece together 2 more layers. The beauty in this cake is that, so long as those cut and paste layers are not sitting on the top or bottom of the cake, no one will be the wiser.
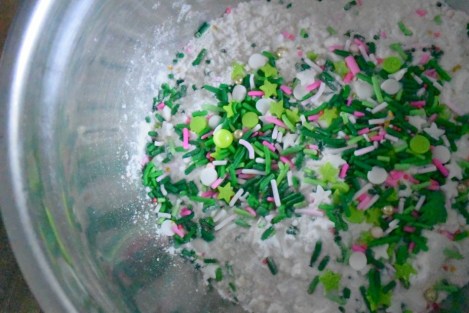
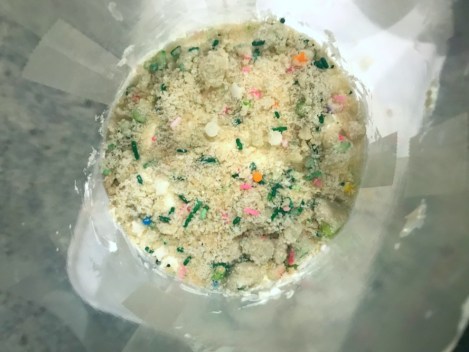
T H E C R U M B L E
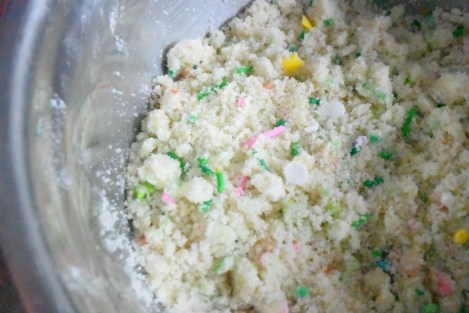
I think this crumble takes the cake! It adds so much delicious texture to each bite and is, therefore, a step that cannot be missed.
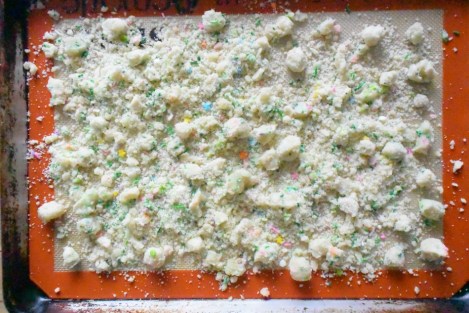
CRUMBLE NOTE: Though I didn’t stray from the recipe, I found that I wasn’t able to naturally create the larger nuggets. To do so, I had to use extra oil and gently squished and rolled together crumble to form them before baking.
T H E I C I N G

ICING NOTE: To keep the icing white, the recipe called for use of artificial clear vanilla extract. I did not have that in my pantry, instead, what I did have was a bottle of Wilton’s White-White food color. To make up for the color added from the vanilla extract used, I added a couple squirts of the white colour to my icing mix.
T H E C O N S T R U C T I O N
This was the trickiest part of the process.

CONSTRUCTION NOTE 1: The key to stacking and forming the cake is using a sheet of acetate. I think the last time I had acetate in possession was in high school when I had write out an equation on an overhead projector. In lieu of acetate, I used what I had on hand which were plastic page protector sheets. I cut the sheet apart, rinsed it, and taped it together as needed to form a tube the size of my cake.
CONSTRUCTION NOTE 2: I opted not to moisten each cake later with milk + vanilla as the recipe called for. I trusted the cake box as it stressed “Super Moist” and this time it was accurate.
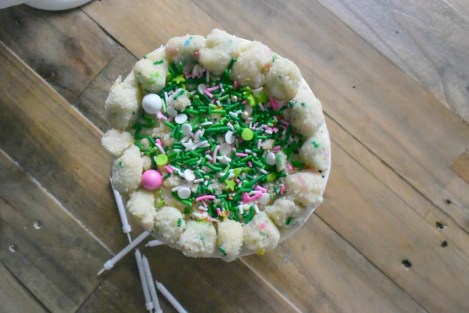

The proud moment built as I gently peeled that plastic sheet from the side of the cake to reveal my 4 layer creation. Mike’s bday cake came out better than I could have dreamed, for a fraction of the price, and tasted as delicious as it looked.

As I continue down this road of Motherhood, I’m slowly amassing a collection of Mommy Hacks; this one being the tastiest. I am quickly learning that you can get most things you once did and chose to do done, you just need to be strategic about it. Plan ahead, make your lists, and put spatula to mixing bowl.
Happy New Year and Happy Birthday Mike!

