
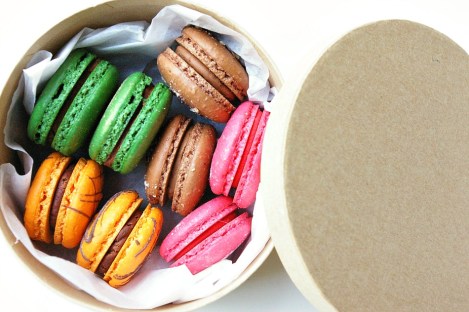
Macarons were alway my cookie-to-bake of choice. Learning to bake a consistent batch may have taken much frustration and a consecutive series of trial and error, but once baked, filled, and sandwiched, they were perfectly pretty as is; no additional decoration required. I’ve baked macarons for countless holidays and events and at the very least, tweaking flavour and/or colour was all that was needed to be done to remain festively on theme.
Last Christmas, I re-tried my hand at a decorated cookie. The cookies were a little on the over baked side and didn’t have that crisp iced-decorated look but I was happy with the outcome. In past attempts, my royal icing was runny, thin, and annoying to work with. Memories of messy cookies and hours of decorating time really solidified my belief in the efficiency of the go-to macarons.
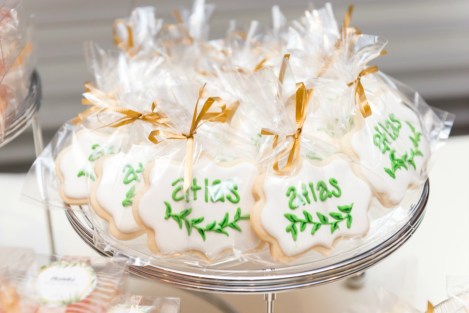
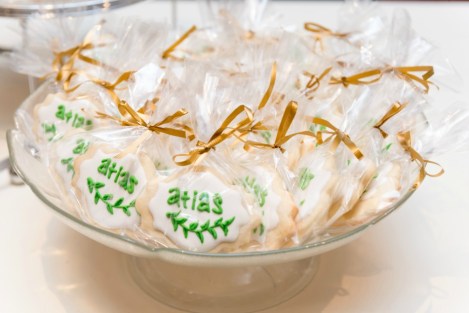
This year, after a recent trip to Winnipeg for Atlas’ baptism, I was put through a mini sugar cookie bootcamp. My Aunt, the designated party baker of the family, not only baked a 3-tiered cake for the event but also baked and decorated [with Atlas’ name] the perfect cookie favours to give out to guests. I helped with the cookie decorating as she gave me some tips and tricks for icing and baking. Armed with a new sugar cookie confidence and flashbacks of my Aunt making the process look easy I was determined to, once again, press pause on the macarons and bake a batch of sugar cookies for Christmas.
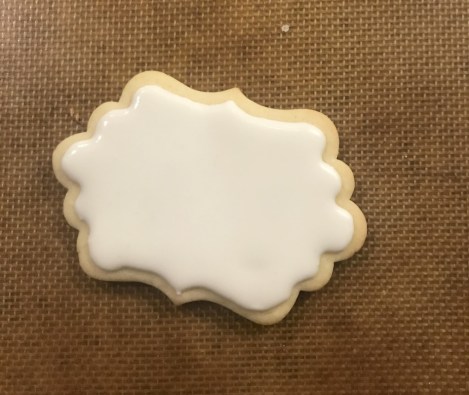
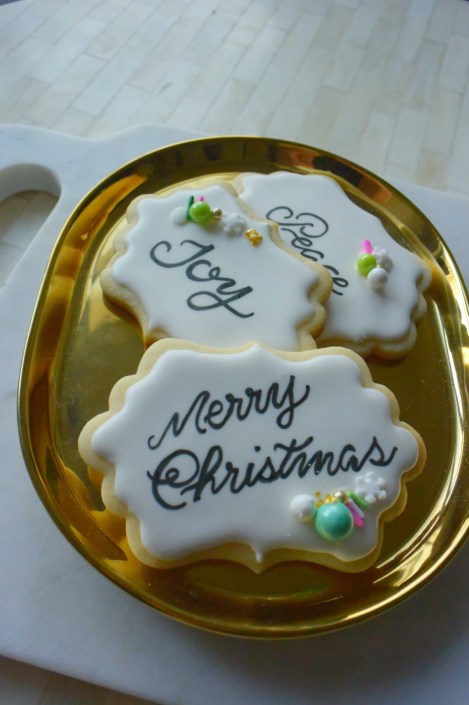
Picking up where I left off last Christmas, I decorated my cookies along the same colour way and shape but without the lemon twist and instead lettered with holiday greetings. Though still not as perfect as my Aunts, I’ve made progress on the icing and decorating fronts and wanted to share the recipes and tips. The fundamentals of flooding and flocking remain the same so I’ll leave that to you to Google/YouTube if needed.

S U G A R C O O K I E S | from Robin Hood Flour -chosen recipe as it required the least number of ingredients! | makes 36 cookies
- 3c flour
- 1tsp baking powder
- 1/2tsp salt
- 1c softened butter
- 1 1/4c sugar
- 3 eggs
- 1tsp vanilla extract
- oven preheated to 375°F
Combine flour + baking powder + salt in a med bowl
With an electric mixer on med speed, cream together butter and sugar until texture is light and fluffy
Beat in eggs and vanilla
Stir flour mixture into creamed mixture
Form dough into 3 balls, wrap with plastic wrap, and chill for about 2hrs
On a floured surface, roll out dough 1 ball at a time to 1/4″ thick
With floured cutters, cut out desire shapes and place on baking sheet

**Ok here’s the secret to your cookies keeping their shape in the oven**
Before baking, place cut cookies in the freezer for at least 15mins
Bake for 7-10 mins
[The recipe says bake until golden brown…but I stalked the cookies in the oven and took them out juuuuust as the bottoms started to brown, they were still soft to touch but hardened once cooled]
Cool on sheet for 5mins then transfer to cooling rack unit ready to decorate

R O Y A L I C I N G | makes about 2 cups
- 1/4c water + extra water for thinning
- 1tsp lemon juice
- 4c sifted icing sugar
- 2tbsp Wilton Color Flow powder mix |**The secret ingredient I never knew about -this powder gives you a shinier and harder icing result
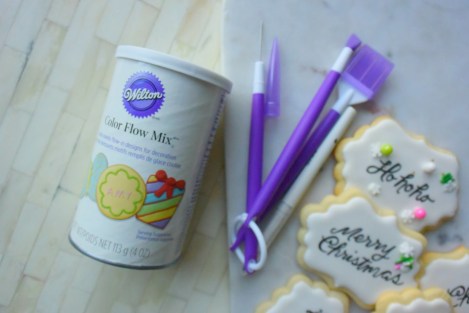
Note: as per the Wilton website, Color Flow Mix has been discontinued but, worry not, you can replace the ingredient with meringue powder
With a paddle attachment on low speed, mix icing sugar + Color Flow powder
Gradually add water and lemon juice
Beat on med speed for about 7mins ensuring to clean bowl sides
Remove bowl from stand mixer
With a spatula, add and mix in water 1tsp at a time until you achieve a good flooding consistency [a bit runnier than honey]
Add desired colour
Scoop into a pipping bag fitted with fine tip and start decorating!
**My last decorating tips are on the design side
*The tool I never knew I needed or existed is this mini angled spatula [by Wilton-see bellow] that acts like a squeegee to help clean edges. It helped take my icing from sloppy to crisp. It’s magical!
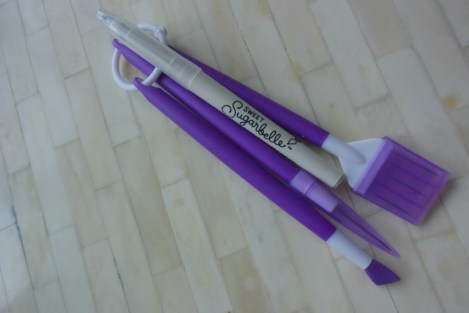
*Since I am not yet an icing lettering pro [LOL I haven’t even attempted] I used this edible ink marker [pictured above] to letter on my Christmas greetings once the icing dried [Note: I left the cookies out to dry over night]. I like to think of it as an efficient way of decorating. You still get the wow and the effort points without all the extra mess.

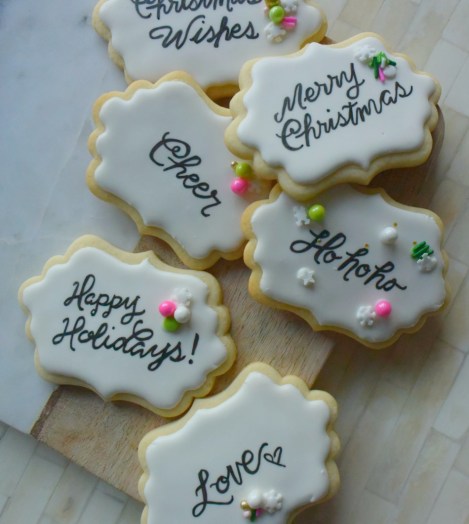

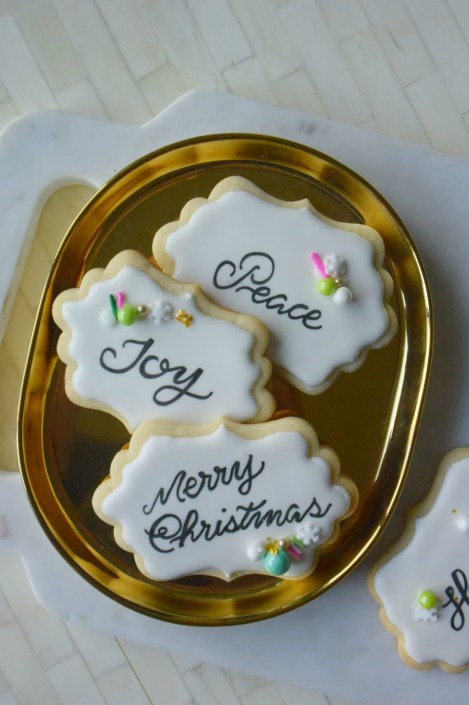
Though not yet at my Aunt’s level, the cookies turned out great; an improvement from last year. Now to keep the ball rolling. I wonder what I will ice next?!
Merry Christmas Everyone! Stay safe, keep warm, and indulge in all the sweet holiday treats. You deserve it!

Atlas cookies photos by -JessLoso Photography
